

Search the Cloud Manual
Adding a RANGER to the Cloud
- Connect the Battery: Plug in the provided battery to the RANGER, so that it can connect to the cellular network.
- Check for Network Connection: Verify that the RANGER is connected to the cellular network by pressing the “CHECKIN” button on the device. If the connection is successful, you should see three flashes of the green status light.
- Login to SignalFire Cloud: Open the SignalFire Cloud website and log in using your account login and password.
- Add the Device: From the Home page, click the “Add Device” button.
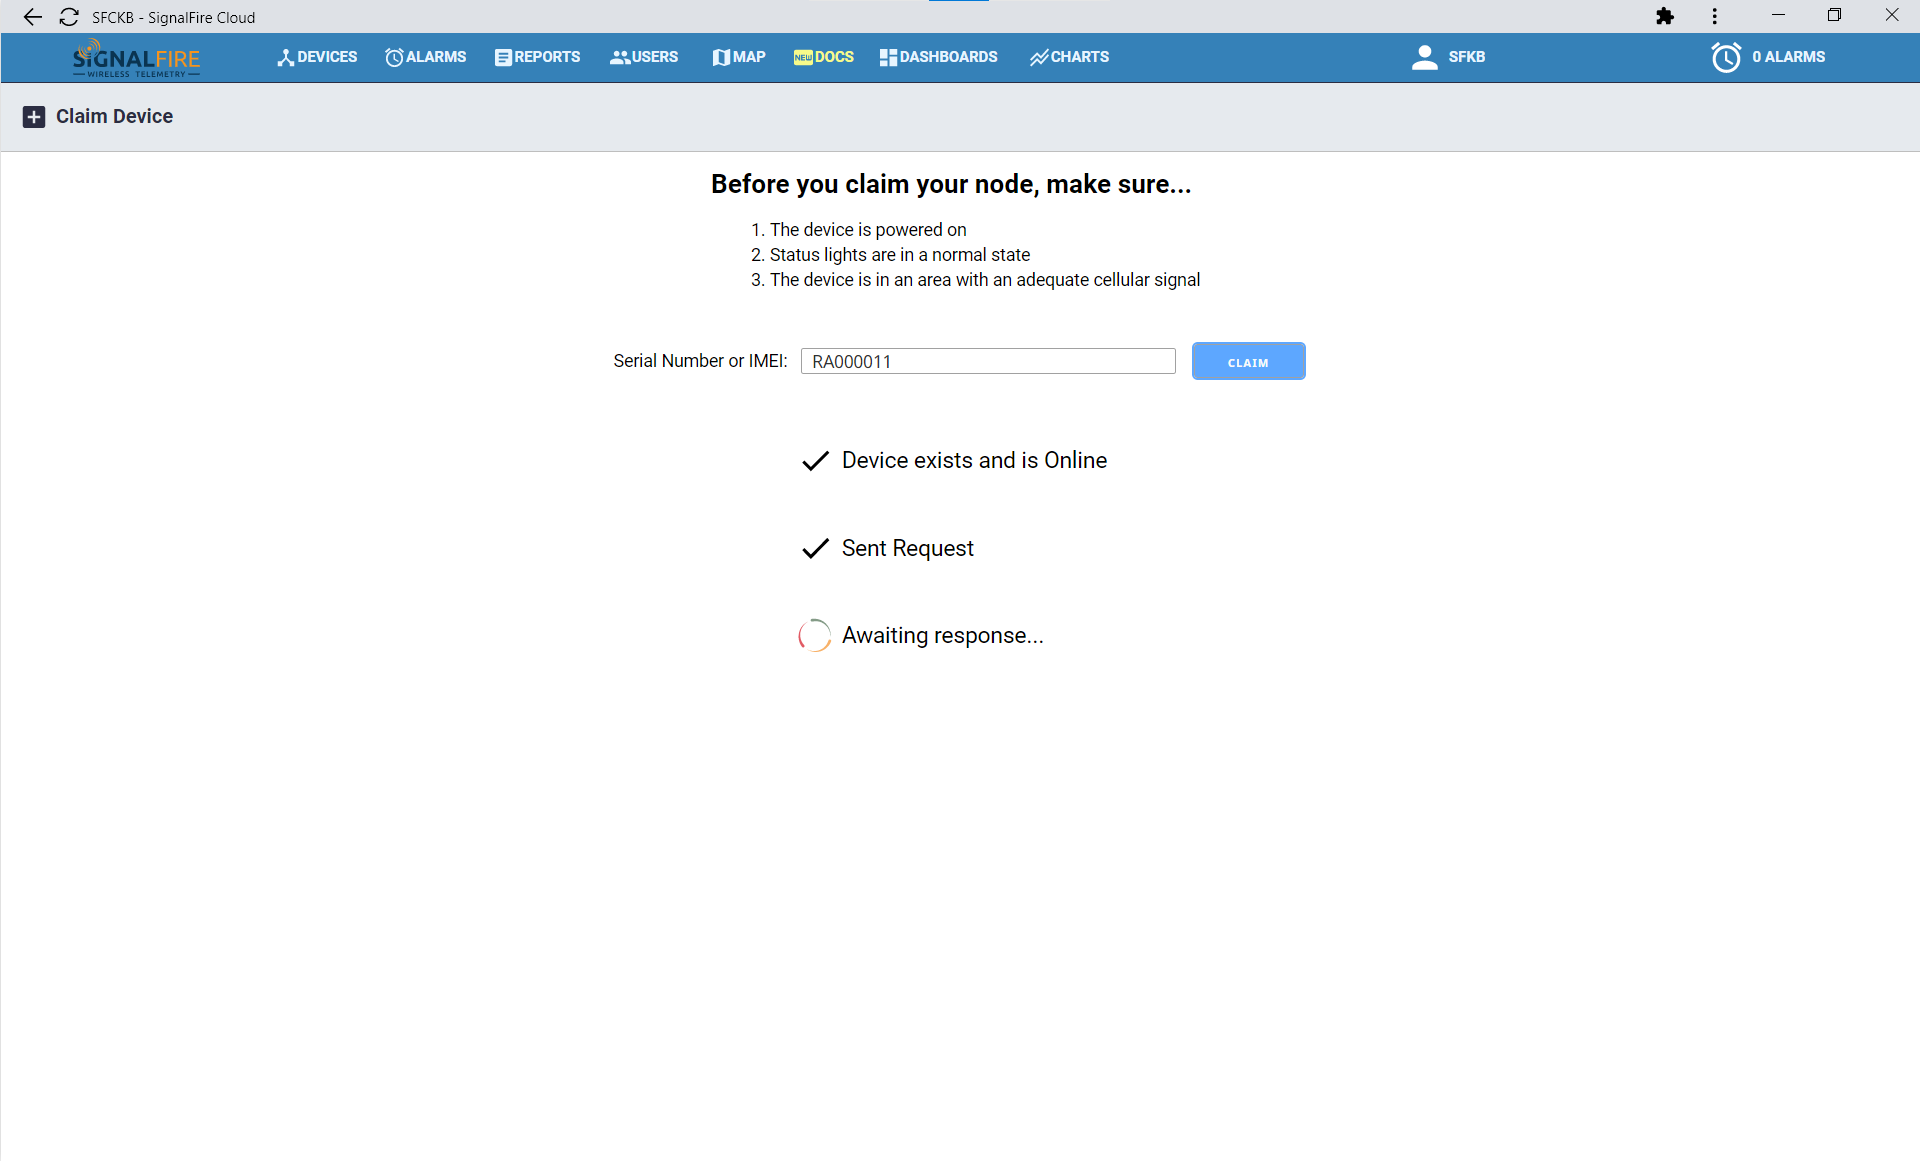
- Enter the Serial Number: Enter the serial number of the RANGER in the provided field. The serial number is located on the bottom of the device and follows the format “RA” followed by 6 numbers (e.g. RA123456).
- Claim the Device: Once you have entered the serial number, click the “Claim” button. This will send a message to the RANGER, instructing it to claim to your group account.
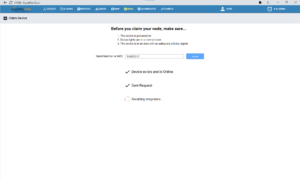
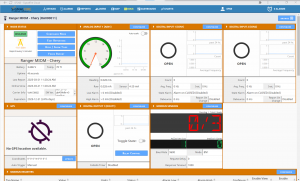
- Wait for Connection: Within approximately one minute, the RANGER will connect to your account. You will then be redirected automatically to the device status page, where you can monitor the device’s
activity and status.