Oil & Gas

SignalFire Telemetry products connect you with crucial product and hardware data at any of your oil and gas operation sites—whether it’s a pump, pipeline, or storage tank.

Water & Wastewater

SignalFire Telemetry devices install anywhere water asset monitoring is needed, whether it’s for collection purposes, treatment, or delivery.

General Industrial

SignalFire Telemetry devices can monitor key assets and can do it affordably, without any renovation or high-priced engineering costs. They install easily with no required cable or additional power. The data is available on your phone or computer and the cloud service can even output to your corporate system to integrate with the rest of your data and keep your operation running.

Agriculture

SignalFire Telemetry devices can monitor and manage water supplies and additives throughout the property, helping you avoid catastrophic shortages and keep your irrigation plan on track.

Tanks & Terminals

Avoid costly product loss in bulk storage tanks, terminals, and transportation movements. Whether calling for tank levels, gauge pressure, or even movement pumps or pipelines, SignalFire products can fill any monitoring gap throughout a facility.

Environmental

Environmental fines for businesses are frustrating and can bring business to a standstill until they’re worked out. No business wants to hurt the environment, and in competitive markets stopping production affects the bottom line and staff. But there are effective and affordable solutions with SignalFire Telemetry devices.

Refining & Petrochemical

Expand visibility and control of your refinery or petrochemical processing facility without expensive renovations or redesigns. And do it with your current gauges and hardware. SignalFire telemetry devices are designed to work in harsh chemical environments and meet the strictest safety and security standards

Utilities

No matter the size of your service map, monitoring remote assets ensures efficiency and keeps your operation in compliance. That’s how SignalFire devices can really help, offering the most affordable and effective monitoring solution that will monitor liquid, gas, electricity, and other assets.

Document Center

Browse all documentation pertaining to SignalFire products.

Cloud Setup

Have a RANGER? Set up your Cloud account here.

Case Studies

Explore the diverse applications of SignalFire Wireless Telemetry Systems across different industries.

Brochures

Access our latest brochures to explore comprehensive information about our products and services.

Commonly Supported Sensors

Easily find the sensors that are compatible with our systems on this dedicated page.

Photos

Explore a comprehensive collection of images showcasing our products, installations, and real-world applications.

News & Articles

Stay up to date with the latest content from SignalFire.

Videos

Explore our video library.

Software Downloads

Get access to the RANGER and SignalFire Toolkit Software.

Contact Tech Support

Skip to main content
< All Topics
Print

Table Tile Instructions

Setting Up a Table Tile

This guide outlines the steps to set up a table tile in the SignalFire Cloud. The table tile is useful in showing multiple measurements onto a single tile.

Up to three tiles can be setup per RANGER or PATRIoT Gateway.

What you can do on a Table Tile:

  • Provide a unique name for the Table Tile
  • Add up to 12 measurements available to a RANGER or a PATRIoT gateway
  • Set the order of the measurements
  • Click on a measurement to view the Mini-Trend and hover your mouse on the trend to read the measurement and timestamp

Key Steps

1. Access Hide Show Tiles

  • Navigate to the Hide Show Tiles section.
  • Click on the button to open the tile options.
  • Select the table you want to make visible.

2. Save Your Selection

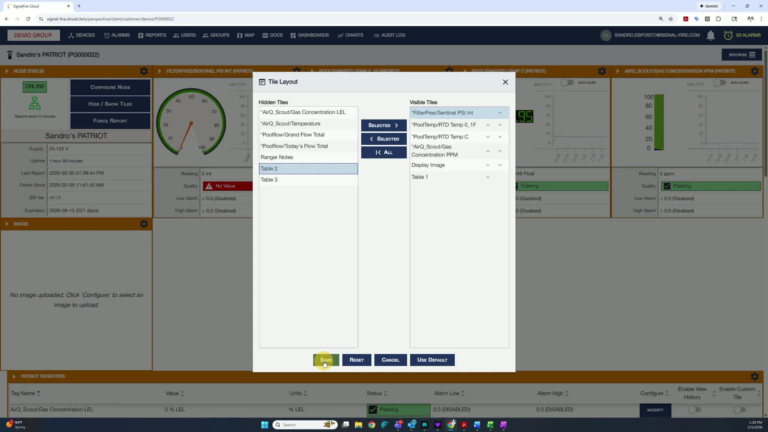
  • After selecting the desired table, click Save to confirm your choice.

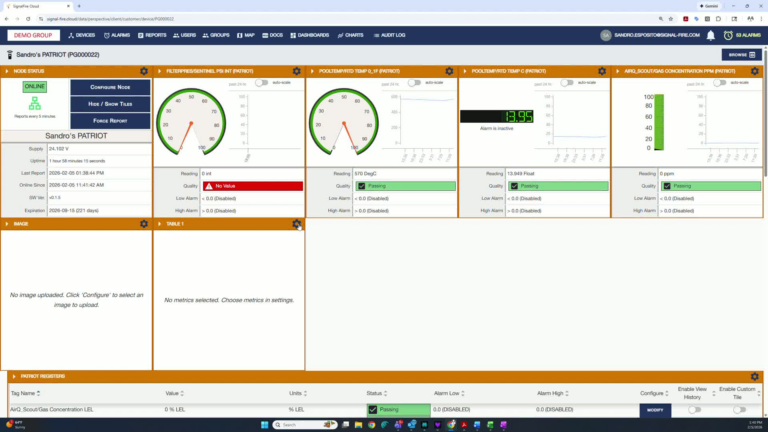
3. Access Table Settings

  • Click on the settings icon of the selected table to configure measurements.

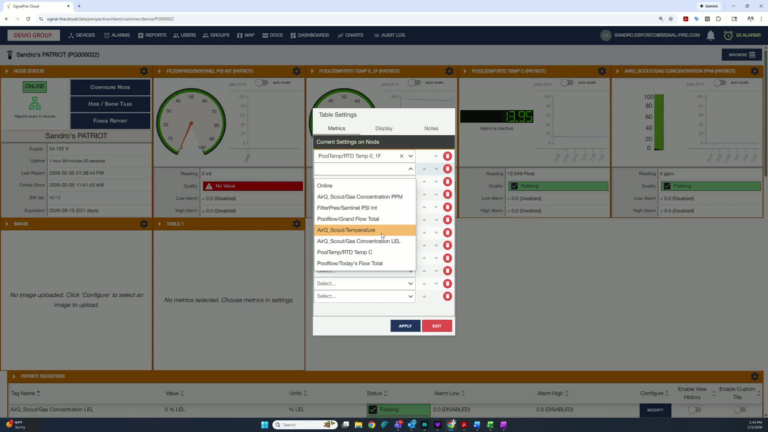
4. Start Adding Measurements

  • Click to get started with adding measurements.
  • From the drop-down menu, select the measurement you want to display on the table tile.

5. Select Multiple Measurements

  • You can select up to 12 measurements to display.
  • Use the up and down arrows to organize the measurements in your preferred order.

6. Apply Your Changes

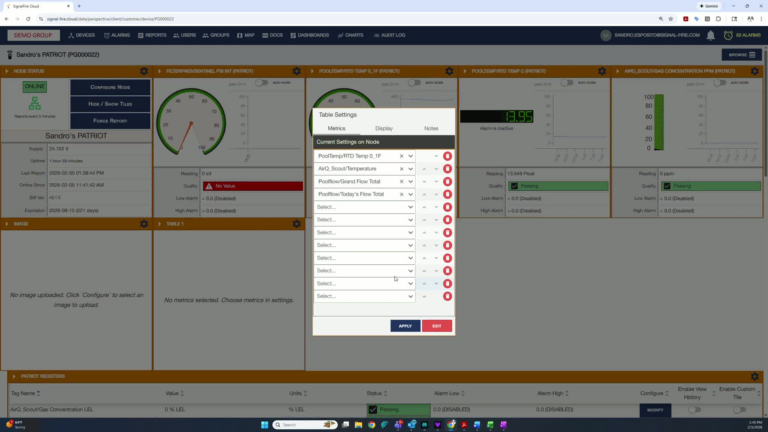
  • Once you have selected and organized your measurements, click Apply to update the table tile.

7. View Measurement Trends

  • Click on the value of each measurement to open the mini-trend pop-up.
  • Hover your mouse over the trace to observe the measurement for that value.

8. Close and Switch Measurements

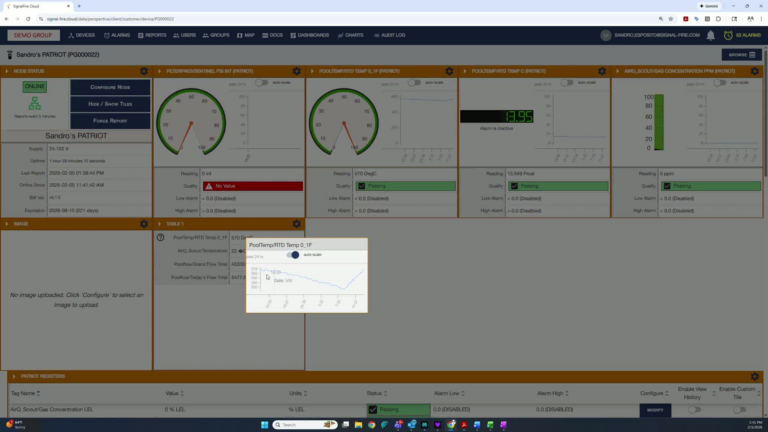
  • Click elsewhere to close the mini-trend.
  • Repeat the process for other measurements by clicking on their values.

Cautionary Notes

  • Ensure that you do not exceed the limit of 12 measurements to avoid display issues.
  • Double-check that the correct table is selected before saving changes.

Tips for Efficiency

  • Organize measurements logically to make the table tile easier to read.
  • Familiarize yourself with the measurement options available in the drop-down menu to speed up the selection process.
Table of Contents